Sweet & Spicy Plantain Tacos + Snapchat Recipe

Hi!

Sorry I have been MIA recently. I have been busy traveling and hosting visitors. But I’m back with another installment to one of my favorite new hobbies: SNAPCHAT RECIPES!

Snapchat is so fun for me. I love the stickers, and the ability to speed up or slow down your videos. I also LOVE sharing my cooking. 99% of the time I’m eating alone, so this allows me to “share” my food with my friends and followers and show you fun, new recipes to try yourself! If you want to follow along, find me at kcrev on Snapchat. I try to post recipes whenever I’m cooking anything interesting.

For this recipe, I made DELICIOUS plantain tacos. Seriously, I was so impressed with how these turned out and they were so flavorful and not too difficult to pull off! You will surely impress anyone you make these for 🙂

So lets see how this works:

For the recipe you will need:

(makes 4 tacos, adjust depending on # of people serving)

  • 2 ripe plantains (they will be slightly tender/soft to the touch, like a ripe avocado, and also have brown spots — see the middle plantains in the main photo for an idea!)
  • Tortillas of choice
  • 1 ripe avocado
  • 2 limes or lime juice
  • 1 Red onion
  • Other toppings: I used black beans and corn, you can add lettuce, cheese, salsa, whatever you have or want!
  • Spices & Seasonings:
    • Agave (or sugar or honey)
    • Salt
    • Pepper
    • Cumin
    • Chili powder
    • Garlic powder
    • Vegetable oil

To make:

1. I pickled the red onions, and they were BOMB. You should too. This is a quick pickle method and it was awesome!!! Cut your red onions into thin strips, put them into a colander and pour boiling water slowly over them, this will soften them (as if they were pickling in liquid over night!). In a separate bowl, add the juice of one lime, 1/4 tsp of salt, and 1 tsp of agave to the liquid. Stir, and add onions in. Stir the onions in the brine, and remember to stir them periodically while the other things cook! They will be delicious and pickled in 30 minutes! 😀

2. Peel and cut the plantains. Add them to a bowl and add seasonings: I added 1 tsp cumin, 1 tsp chili powder, 1/4 tsp salt and pepper, 1/4 tsp garlic powder, and 2 tsp agave. Stir.

3. Heat vegetable oil in a frying pan on medium heat. Add plantains (see video) and reduce heat if they are browning too quickly. I reduced my heat to medium low. Cook for about 2-3 minutes or until they are golden brown and look slightly crispy. Then flip and repeat. Once they are cooked on both sides. Place on plate with paper towel to drain excess oil.

4. While this is happening, I heated up a can of black beans (rinsed) and some frozen corn on the stove. I also mashed a whole avocado with a little lime juice and salt.

5. Once your plantains are cooked fully, it’s time to assemble the tacos! As you can see from the video, I spread out some avocado, added the corn and beans, added some plantains and topped with the amazing pickled onions! I really think those are essential because they add a crisp, acidic bite, and really balance out the sweet and salty and spicy aspects of this dish. It was SO good. I am drooling just writing the post.

I hope you all try these at some point! Plantains are so delicious and they are pretty easily found in most grocery stores by the bananas. This is a perfect, light, summery dinner idea that everyone will love ❤

Thanks for reading!

Butternut Squash & Carrot Yellow Curry (Vegan)

Happy May, Everyone!

It’s week two of my plant-based challenge and all is well! I tried vegan mozzarella on a pizza… It was not too bad (although cheese is one of my favorite foods, so I am very biased). I also made vegan carrot cake cupcakes and they were to die for. I’ll share the recipe soon 😉 All of this cooking and experimenting has been super fun. I will say I haven’t stuck to it 100%: I accidentally had egg in some Pad Thai Saturday and also ate a cheeseburger after going out… we can’t all be perfect! I think what I’ve learned from this challenge so far is that everything is good in moderation. I’ve found an article about the Flexitarian Diet, and I think I fit into that category. But I’m not sure I want to be in any category, honestly. The labels scare me… But I will say, I feel great and I don’t feel overly full or gross after eating 🙂

Processed with VSCO with c1 preset

Squash and Carrot Curry Paste. Mmmmm.

Last week, I had some extra time, so I made one of my all time favorite dishes: CURRY! I literally make it differently every time. Sometimes I just use yellow curry powder, sometimes I add lots of spices, sometimes I just use red curry paste, it really just depends what I have on hand. This time however, I had some butternut squash and carrots and I used them to make some super yellow curry sauce with rice and veggies. The sauce is so rich and creamy and dreamy and I am practically  drooling just thinking of it. Also, the best part about this dish is you literally can’t mess it up. You just go through the motions and enjoy! Keep reading for the recipe:

Processed with VSCO with f2 preset

Yellow Curry Sauce (2 servings):

Processed with VSCO with f2 preset

Veggies for the paste 😛

  • 3 or 4 large Carrots, peeled, and cubed
  • 1 Butternut Squash, peeled, and cubed
  • 1 stalk Celery, chopped
  • 1/2 White Onion, chopped
  • Other vegetables of choice (I used frozen corn and green beans, as well as the remaining carrot and butternut squash)
  • 1/2 tsp Ginger
  • 1/2 tsp Turmeric
  • 1 tsp Garam Masala
  • 1 – 1 1/2 tsp Yellow Curry Powder
  • Pinch of Cayenne Pepper (if you like heat!)
  • 1 tsp Salt + 1 tsp Black Pepper
  • 1/4 Cup Fresh Cilantro
  • 1 can of coconut milk
Processed with VSCO with f2 preset

Curry Sauce in Action

  1. Cook onions over medium heat until transparent and fragrant.
  2. Add about 1/3 of the carrots, and 1/3 of the squash to boiling water, cook until fork tender (about 10-15 mins). Drain.
  3. Add spices, cooked carrots and squash, cooked onion, and cilantro to food processor. Blend until completely smooth.
  4. In order to speed up the process, I microwaved the remaining squash and carrots for about a minute.
  5. Add pureed sauce to sauce pan, add 1 can of coconut milk, and stir. It will be very creamy and smell delicious.
  6. Add remaining vegetables to the sauce pan and cover. Bring to light boil. Reduce heat and simmer for 20 mins.
  7. Serve over rice if desired and enjoy!

Thanks for reading! I’ll be back soon with even more recipes… For now, I’m off to eat another carrot cupcake 😉


Cauliflower “Parmesan” Pasta + Plant Based Challenge

Happy Wednesday, everyone!

I made a decision last week that I was going to try a two week plant based challenge. I actually eat mostly plant based… but I wanted to try and go full on for two weeks of clean, mostly healthy, eating. Honestly, when I’m eating normally, I love to eat cheese, baked goods, ice cream, mostly healthy, but the other stuff tends to be  more on the UNhealthy side of things, so I really wanted to challenge myself to say NO to my cravings and see how I feel after two solid weeks of this.

It’s only been two days… and I’ve already been going a tiny bit nuts. Mostly because I went to Homegoods after work and all of the caramel popcorns and cheesey chips looked all too satisfying for my hungry self. But, I refrained and we’re all good. I digress. So one other reason I wanted to challenge myself to this was because I want to try new recipes and new foods entirely. I’ve already been cooking some new things and I can’t wait to share them all with you.

I’ve been loving looking at recipes from Minimalist Baker, It’s To Die For, Love and Lemons, and Hot For Food Blog. Also, What I Eat In a Day YouTube videos provide great food inspo and recipes.

Monday night, I was craving some pasta so I decided to make a plant based version of chicken parmesan with spaghetti and marinara sauce. Except, for the chicken, I used roasted cauliflower. Cauliflower is having a major moment in the food blog realm, and I’ve been loving it recently. I also made some “parmesan” from raw cashews and garlic powder. Not exactly cheese, but it was really delicious nonetheless.

cauliparm4

Roasted Cauliflower with Vegan “Parmesan” Cheese

It ended up being a quick, super garlicky dinner and it was really satisfying. Keep reading for the recipe and steps!

Vegan “Parmesan” Cheese:

cauliparm2

  • 1/2 cup raw, unsalted cashews
  • 1/2 tsp garlic powder
  • 1/4 tsp salt
  • 1/4 pepper
  • 1/2 tsp dried basil (optional)

Pulse all ingredients in a food processor (I used my Magic Bullet) until it’s a fine powder. You don’t want to over blend it, as it might turn into a butter. It’s that easy! Put leftovers in the fridge for up to 2 weeks.

Roasted Garlic Cauliflower:

cauliparm1

Preheat oven to 375 degrees.

  • 1 clove garlic, minced
  • 1 head cauliflower
  • 3 Tbsp olive oil
  • Pinch of salt and pepper
  • Any poultry seasoning you have (to help make the “chicken” flavor), I used a blend of paprika, thyme, basil, and oregano
  • 1/2 tsp turmeric (for the yellow color)

Mince garlic. Cut up cauliflower into florets, put in a bowl. Add garlic, oil, and spices to bowl and mix. Cook in oven for 20 mins. Stir, cook for 15-20 more minutes, until cauliflower is nicely roasted and golden brown.

To complete the meal:

cauliparm3

Pictured in my Ziplock container because I brought it for lunch the next day 😉

Cook pasta of choice, and add marinara sauce. Add cauliflower and sprinkle with “parmesan.” Not exactly chicken parmesan, but a very delicious and healthy alternative!

I’ve already been loving trying new recipes. It truly keeps me excited throughout the day! I’ll be back this week to bring you more plant based recipes 🙂

Are any of you guys plant based eaters? Do you have any favorite recipes to share or that you’d like me to try to make plant based? 

Thanks for reading!


Berry Power Smoothie Bowl & Homemade Granola

smoothiebowl

I made this delicious bowl for breakfast the other day and the colors were too beautiful not to photograph. I was craving granola and decided to whip some up. Homemade granola is 1000% better than anything you can get in a store (but maybe I’m just biased) because you can pick exactly what goes into it… And there’s not 20g of hidden sugar, which is a plus.

This was the perfect springtime breakfast and gave me plenty of energy for a Sunday afternoon full of running errands and cleaning. So fun! 😉

I topped my power bowl off with some kiwi, hemp seeds (my new obsession! The texture is amazing), chia seeds, toasted coconut and of course, the granola. So. Good.

For the granola:

You can really use whatever you want or have on hand. I used:

-1/2 cup old fashioned oats

– 1/4 steel cut oats (when they bake, they get slightly puffy and crunchy, it’s amazing.)

– 2 Tbsp honey or agave (you can add more or less depending on your preference)

– 1 to 2 Tbsp coconut oil (or vegetable oil; you want an oil with little to no flavor, but coconut oil tastes nice in this since it’s slightly sweet)

– 1/2 tsp cinnamon (more or less to taste)

– Pinch of salt

Preheat your oven to 325 degrees. The low temp is important to slowly cook your mixture. You will need to keep checking on your granola and stirring it around until it’s toasted and golden brown.

Line baking sheet with foil or parchment paper. Melt your coconut oil. Mix all ingredients together in a bowl. Mix well. Spread evenly on baking sheet. Put in the oven for 10 minutes, then stir. Repeat two more times (30 minutes total). Your granola should be golden brown and look toasted. If it’s not fully cooked, put it back in the oven for 5 minutes, and stir. Repeat if necessary. All granola is different, so just be mindful and keep an eye on it 🙂 Let mixture cool completely. Once your mixture is cool, you can add nuts and dried fruit if you would like. I added a mixture of sunflower seeds, pumpkin seeds and almonds to mine.

For the smoothie bowl:

Texture here is key. You want to use all (or mostly) frozen fruit and a little bit of almond milk to help it all blend. The less milk the better (you want to literally be able to scoop your smoothie up with a spoon). You can add a little more milk and blend, add more milk and blend, and repeat until all fruit is blended.  I used about 1/3 cup of almond milk and one frozen banana, 1/2 cup frozen raspberries and 1/2 cup frozen mango. It was a delicious combo 🙂 You can’t really mess this one up, just be sure to use a little bit of milk and gradually add more as you need to.

Once the smoothie portion is made, add to a bowl, add fresh fruit, your delicious homemade granola, and as many superfood toppings as you like. Be sure to take an artsy picture of it to show everyone your beautiful creation.

Thanks for reading!


Snapchat Recipe: Vegan BBQ Pulled Jackfruit “Pork” Sandwiches

Image from Erin Ireland.

One of my new favorite hobbies is posting my cooking adventures on Snapchat for everyone to see. I thought I would compile my latest trial for you to see here. I made Vegan BBQ Pulled Jackfruit “Pork” Sandwiches – a mouthful, literally 😉

This is an easy alternative to pork, and it honestly had a really similar taste and texture. Definitely recommend.

I loosely followed this recipe by Erin Ireland. Her blog is so cute!

Be sure to follow me on Snapchat @ kcrev to see more!


Thanks for reading!

Friday Favorites

TGIF!!! We all deserve gold stars for making it through the week 😉

This post is pretty self-explanatory… I thought I would stop by and share my favorites from the past month or so. Although very random, here are some of the lifestyle items I’ve been loving lately:


“Recreating” Recipes from Restaurants

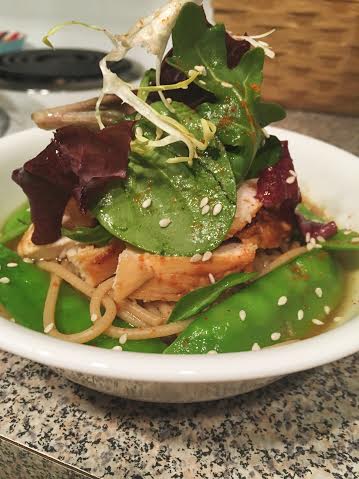
I went to New York about a month ago and boy, there was no shortage of food in that city. Since I love to cook and explore new restaurants, I was so excited for all the fun stops we made on my trip. Unfortunately, I can’t get the exact same meals here in FL, so I have been loving trying to recreate some of the items I tried. One night, we went to Jin Ramen in the Upper West Side, and I ordered this amazing warm BBQ chicken noodle dish. It was basically a gift from heaven considering it was the coldest Valentine’s weekend the city had had in 75 years. Needless to say, it just warmed my heart and I was about ready to have it again shortly after arriving back in FL. My own dish had some slight tweaks, but it was still pretty delicious. Once I perfect the recipe, I’ll be sure to share. I also attempted to make a batch of Momofuku Milk Bar cookies and it was not a pretty sight…

Jin Ramen

The Original Inspiration

Ramen

My Recreation

My New Warby Parker Glasses

I wear glasses quite often since putting in contacts when you’re tired in the morning is hard (and I’m lazy 😉 ), and I’d been feeling a bit bored with my current glasses. I practically stalk Warby Parker on all social media outlets, so when I saw they released a pair of clear, yet slightly pink glasses, I was immediately drawn. I got the Warby Parker Chelsea in Grapefruit Soda (such a perfect description of the color, too!) When I was in Austin, I stopped by their pop-up shop — which is inside of a working school bus, by the way (seriously, they’re the coolest  brand), and finally purchased the pair. I’ve been so obsessed with this season’s “Blush” trend, and I love accessorizing my face with the color too.

Processed with VSCOcam with c1 preset

Grapefruit Soda Glasses


Himalayan Rock Salt Lamp 

This baby is the newest resident in my apartment and it casts the most beautiful, subtle, almost candlelight glow. I love plugging in my Himalayan Rock Salt lamp every night after work and practically feeling all of my stress and worries float away. You can read about the benefits of rock salt lamps here. It might be a total placebo effect, but hey, it’s working for me, and maybe it will work for you 🙂


salt-lamps-designs-for-the-interior

Image via.


All Things BLUSH

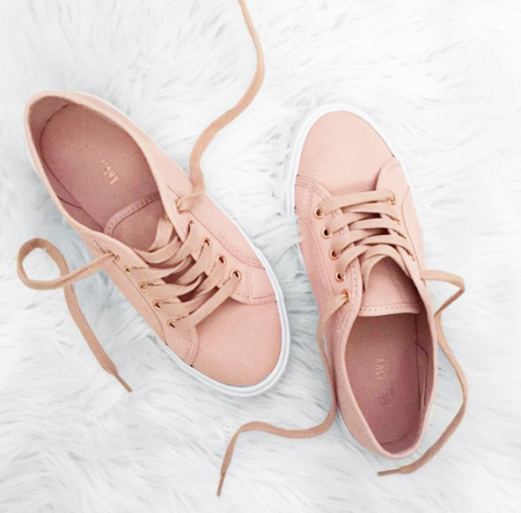
I can’t get enough of this color. Pantone even named it the color of the year (Rose Quartz… blush… same thing, right?) I already have glasses in this light rosy hue, and I’ve recently picked up a pair of shoes (check in store for the ones below!), nail polish, and a skirt. Not to mention I gravitate toward items of this color when I’m getting dressed most days of the week. I might need an intervention.

picsart_1453497168226

Essie in High Class Affair – A beautiful apricot blush color.

Screen Shot 2016-03-10 at 11.11.22 PM

Image via.


Happy Weekend! Cheers! 

The Nail Files: Valentine’s Day Pink Manicure

I’m a sucker for cutesy, themed nails and with the loveliest day of the year approaching, I decided to paint some hearts on my nails and call it a Valentine’s Day manicure.


Processed with VSCOcam with c1 preset


I used a handy toothpick to make the hearts on my nails in different colors. Make  sure to file one side of the toothpick until it is flat with a larger surface. This helps make the larger dots.


Processed with VSCOcam with c1 preset

❤ ❤ ❤


Make two “large” dots right next to each other to form the top of the heart, then flip the toothpick over and make a small dot for the pointy tip of the heart at the bottom. Add a little more polish to your toothpick and drag the dots together to make a heart. Takes a steady hand, but with a little practice, it’ll look great 🙂 Or, watch a tutorial here.


Processed with VSCOcam with c1 preset

I used Essie in Boom Boom Room, Pansy, and Ballet Slippers


Happy Valentine’s Day!

Thanks for reading.

Kara


Charleston Travel Journal

One afternoon at work in September, my friend gchatted me and another friend and said “This is crazy, but do you guys want to drive to Charleston, SC after work?” So basically, I typed “Charleston” into Google, checked out a few pictures, and agreed! I had no idea how much I would fall in love with the charming city, and I was only there for 36 hours. It has so much to offer and I was so excited to have an opportunity to go back for three days at the end of January for the Yoga Girl Gratitude Tour and a little R&R.

dsc_3004-l

Image via.

Charleston is about a nine hour drive from south FL, which means we left at 6 AM to seize the evening as best we could. I’ve mentioned before how much I love traveling and I honestly have to say Charleston is probably one of my favorite places I’ve ever visited. It reminds me so much of Madison, WI (which I considered home for four amazing years), and any city that remotely resembles Madison (great food, plentiful outdoor activities, cute coffee shops, and a fun, young community) immediately grasps a place in my heart. I hope to go back to Charleston again because I feel like there is still so much to see.

Alas, here are some photos from my wonderful trip, try not to drool (I’m having a hard time over here…):

First thing’s first, we got some Low Country style BBQ at Smoke BBQ. The waiter told us they used to be a vegan restaurant (lol) and then they turned it into a cute little place with live music on the weekends. I had a spicy brisket sandwich with chedda and delicious mac n cheese. Mmmm…

char5

Low quality photo, high quality BBQ 😛

The following day, we visited Charles Towne Landing, which was essentially a giant park situated on the river where the first settlers of Charleston arrived. There was so much to do and it was a beautiful day. We walked around the entire park looking at the plantation home (popular for weddings, so idyllic), a replica of the ship they arrived on, a fort, and there was even a cannon firing. The best part of the park was that there was also a small zoo. I love zoos. Also, the camellias were blooming and were so gorgeous.

char2

One of many flowers around Charles Towne Landing.

Processed with VSCOcam with f2 preset

Aren’t these the coolest trees?

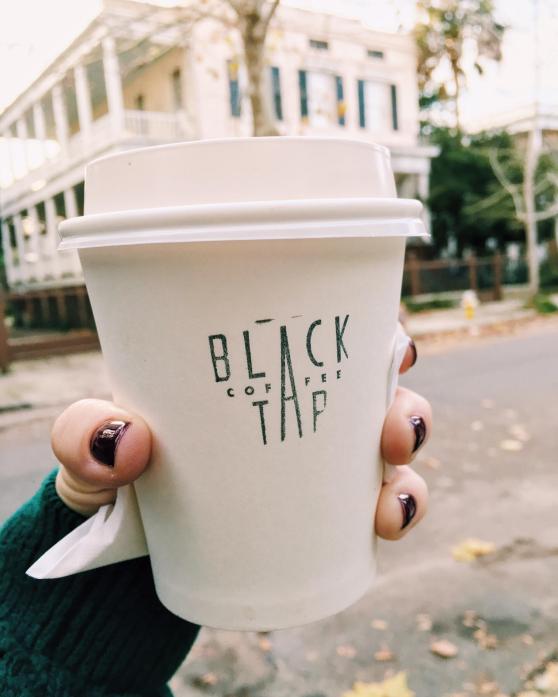
Afterwards we went to King Street in the town center to shop around and oh boy the shopping is so good. So is the coffee. I got an ahhhhmazing latte at Black Tap Coffee and it was so good we went back again the next day before leaving to get another one.

Processed with VSCOcam with c1 preset

Brown Sugar Latte c/o Black Tap Coffee.

There are some really cute boutiques amongst some better known stores nestled in between delicious smelling restaurants. We decided to eat at Thai food at CO. It was delicious (do you see a theme here at all?). Then, because I wasn’t done eating yet, I got ice cream. At Jeni’s. Oh. My. I have a major thing for ice cream, and this was definitely one of the best. They had such unique flavors. They were even advertising Churro ice cream, but I was drawn to a few others.

char3

Pistachio honey; Blackberry lavender; Brambleberry crisp; drool.

char4

Those flavors ❤

The next morning, we took a drive to Folly Beach to have brunch at a local favorite called Lost Dog Cafe. It was so busy, we definitely knew we made a good choice. I decided to get a Charleston staple: She Crab Soup, even though it was barely 11 am. It was delicious and so creamy. It was a chilly morning and we sat outside, so it was the perfect treat.

char1

Lost Dog Cafe brunch

After brunch, we headed to the beach and drove along the shore to look at the amazing houses. They were so beautiful and reminded me of a summer vacation dream home. We also got out of the car for about two seconds before deciding it was too cold and we ditched that idea real quick. Florida has truly changed me. :/

char6

Folly Beach Pier

After perusing the shops a bit more, we headed to the main event: YOGA GIRL! I am mildly obsessed with Rachel Brathen and when I saw her tour had a stop in Charleston, I knew I had to be there. We got there about three hours early and waited in line with 400 other eager yogi’s to get a good spot for her 75 minute flow class. We were in the 5th row. NBD 😉 . She was so beautiful and inspirational. Her dog (!) and husband (!!!) were also there, and it was just such a fun experience overall. Not to mention, probably the best yoga class I’ve ever been to in my life.

char10

Rachel speaking words of wisdom to us yogi’s

After the class we passed out and then woke up to drive all the way back to FL. It was such a wonderful trip and I’m sad I ever had to leave.

Charleston, I love you. You are wonderful. ❤

Thank you for reading my travel novel. I hope you have the opportunity to visit Charleston at some point as well!


Kara

Homemade Creamy Almond Milk

I’m a self professed crazy person when it comes to making my own homemade anything: Soups, sauces, the list goes on… and now we can add almond milk to my repertoire! There is just something so satisfying to me knowing that I’m eating something and I know exactly all of the ingredients in it and there are no preservatives.

almond milk 3

It looks good with my wall color too 😉

I was inspired to make this almond milk because of Jillian Harris & Erin Ireland, two canadian friends who have such entertaining Snapchat stories (If you’re not following them, do yourself a favor– Best. Accents. Ever.) . They both made this almond milk recently and I was so intrigued, I decided to try my hand at it today, and it is de-lish-us. It’s exceptionally creamy and tastes like a fresh shortbread cookie to me. I am definitely going to make my own almond milk from now on and you should too! It’s crazy easy, and you only need a few ingredients.

To make the best Homemade Creamy Almond Milk:

  • You will need a powerful blender or food processor. I used my Ninja Food Chopper but a Magic Bullet would work too.
  • 1 cup of raw, plain almonds
  • 4 cups of cold filtered water
  • Vanilla extract (Optional)
  • Cinnamon (Optional)
  • Honey (or dates, Optional)
  • Pinch of salt (Optional, brings out the sweetness!)

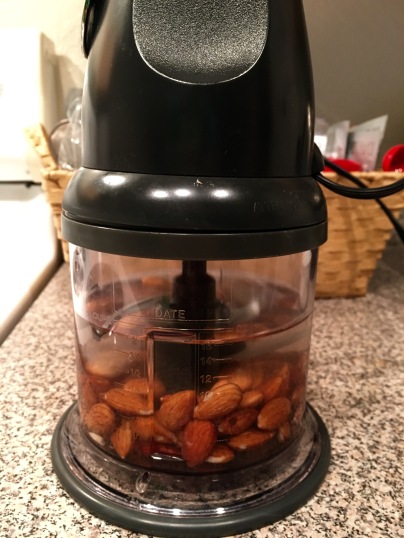
First, put your almonds in an airtight container, cover with water, cover and refrigerate over night. You want your almonds to be completely soaked and swollen so they will blend very easily the next day.

almond milk 6.jpg

Raw almonds, soaked overnight.

The next day, drain and rinse your almonds well. Place in blender and add 4 cups of cold filtered water, and the other ingredients if you please. The best part about making your own almond milk is you can control the flavors! I added a splash of vanilla extract, a pinch of salt, a tiny bit of honey for sweetness, and a lot of extra cinnamon. Blend for about a minute until the almonds are almost completely smooth and milk appears frothy.

almond milk 5

Add cold, filtered water to blender.

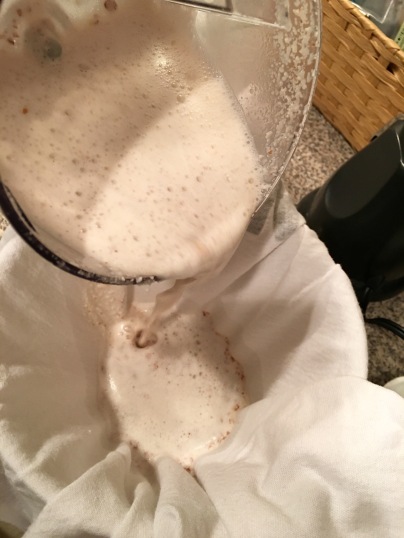
almond milk 4

Pour over a well loved (but clean) frat tank.

The next part gets a little fun. Use an old t-shirt (or frat tank… oh the memories!) to strain the milk from the almond meal. Place the shirt over a large bowl, and pour into the bowl. Most of the milk will seep right through, however, you will need to do a little extra squeezing to get all of the milky goodness out of the almond meal. Once you’re finished, you’ve got both delicious almond milk, and totally usable almond meal! Double whammy.

almond milk2

Squeeze!

Store your almond milk in an air tight jar for about one week. Shake or stir milk before using.

almond milk 1

And yum.

I added some to my oatmeal this morning, and I swear it was the best oatmeal I’ve ever made. It will truly change your milk life for the better.

Thanks for reading! Happy sipping,

Kara

P.S. You can use the leftover almond meal in other recipes (I’m going to use it in my protein bites recipe instead of pulverizing the oats first.), or you can use it in baking if you let it dry completely, and grind it even more to make almond flour to use as a substitute for regular flour. Or you can freeze it until you decide what to do with it. Phew!


Delicata Squash Two Ways

I fell in love with a squash recently, and she goes by the name of Delicata. I’ve seen this squash be called “the lazy man’s squash” because you don’t need to peel it before cooking/eating, but it’s just so perfect and delicious, it doesn’t deserve to be made fun of. It tastes similar to a butternut squash, with very comparable texture, but it’s so sweet it almost tastes like it has sugar on it, in the best way possible. It’s the perfect addition to savory recipes.

delicata_squash

She’s a beaut. Picture via.

I made this squash last week and had an extra store bought pizza crust on hand so I decided to make a flatbread, and oh my, it was great. And then tonight, I was craving soup (story of my life) so I decided to make delicata, sweet potato and carrot soup. Also, delicious. I am so sad I have gone 23 years without having tried delicata. It’s going to be a regular on my grocery list for as long as I can get it in season.

Delicata & Basil Flatbread:

Processed with VSCOcam with f2 preset

The most delicious delicata flatbread. Served with zoodles and marinara. Mmmm…

1 store bought flat bread (mine was a personal size, but any size works)

1/2 delicata squash (you can use the whole squash if you have a larger flatbread)

Olive oil

Fresh basil

Fresh parmesan cheese

Salt and pepper

easy-30-minute-delicata-squash-bake-recipe-vegan-glutenfree-thanksgiving-fall

Delicata moons. Image via.

To make:

Slice delicata squash in half lengthwise. Remove seeds with spoon. Cut into strips. It will make little squash moons (so fun!). Place on baking sheet. Drizzle a little olive oil and salt and pepper over top. Bake on 375 degrees for about 25 minutes. Cook flatbread (without anything on it) according to package for a portion of the time. Mine said to cook for 12 minutes, so I cooked it for 8 minutes alone. Then I removed it from the oven, added a drizzle of olive oil, topped with squash and parmesan cheese. Cook for remaining time. Finally, top with fresh cut basil to taste. So easy, so, so good.

Delicata, Sweet Potato & Carrot Soup:

Processed with VSCOcam with c1 preset

Delicata soup served with extra cheesy garlic bread. Wine not pictured.

(This makes about 3 servings, I usually make small batches because I get sick of eating the same thing over and over. Feel free to double if feeding more people than just one.)

1 delicata squash

1 sweet potato, peeled

1 cup carrots (I used baby carrots, otherwise peel your carrots)

3 cups of water, hot

1 veggie bouillon cube

2 sage leaves, chopped

1/2 yellow onion, chopped

1 clove garlic, minced

salt & pepper to taste

Olive oil

2 tbsp heavy cream, optional

Spoonful plain greek yogurt for topping, optional

To make:

First, preheat oven to 375. Peel sweet potato and cut into small pieces. Cut delicata lengthwise and remove seeds. Place on cooking sheet. Drizzle with olive oil and salt and pepper. Cook for 30 minutes. Let cool.

In a pot, add olive oil on medium heat. Add chopped onion and carrots (I cut my baby carrots in half and in half again, just to speed up cooking). Next, add a little water and a pinch of salt to simmer veggies. Cover. Cook for about 5-8 minutes. Then add sweet potato and delicata squash part only, not skin (NOTE: Use a spoon to remove delicata from peel, it will come off super easily, although it’s a little bit messy.) Add cut up sage leaves and garlic. Stir. Let cook for about 2 minutes. Next, add 2 cups of hot water and bouillon cube. Bring to boil. Cook for about 5 minutes. I used my immersion blender to blend the mixture completely smooth. Otherwise, you can put it in the blender in batches until you reach your desired consistency. Next, I added the remaining 1 cup of water and blended it a little more. Add salt & pepper to taste. Finally, I channeled my inner Pioneer Woman (I love you, Ree) and added some heavy cream for decadence. I finished it off with a dollop of plain greek yogurt because that’s honestly delicious on everything. I have to admit this is one of my favorite soups I’ve ever made.

Thank you for opening my eyes to happiness and delicious meals, Delicata.

Thanks for reading!